• Home
  • Suggest A DIY
  • DIY Newsletter

Cross-Stitch

Charts, patterns and everything needlepoint

  • About CraftGossip
  • Our Network
    • Bath & Body Crafts
    • Candle Making Ideas
    • Crochet Ideas
    • Cross Stitch
    • Edible Crafts
    • Felting Patterns
    • Glass Art
    • Home & Garden Ideas
    • Indie Crafts
    • Jewelry Making
    • Kids Crafts
    • Knitting Patterns
    • Lesson Plans
    • Needlework
    • Party Ideas
    • Polymer Clay
    • Quilting Ideas
    • Recycled Crafts
    • Scrapbooking
    • Sewing Patterns
    • Card Making
    • DIY Weddings
    • Not Craft Ideas
  • Giveaways
  • Roundups
  • Store
  • Search

Designer Spotlight: Stitching Housewives

October 21, 2026 by Sarah White

Stitching Housewives offers a ton of cute, sort of country feeling cross stitch patterns with different themes I don’t quite understand but they’re super cute so let’s get into it. 

One section is called Dapper Doodads, which it looks like are all square. Tiered Tray Tidbits are generally more rectangular, and RoundAbouts are circular. There are also Sassy Strippers, and I don’t know what the difference among all the different kinds is. All of them are colorful, graphic, often with text, and mounted on something cute. A lot of them are seasonal designs.

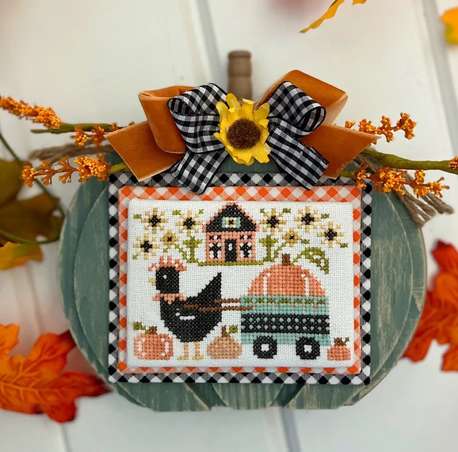
Just as an example, here’s Charlie Chicken, a big black chicken hauling an even bigger pumpkin in a wagon past a house with sunflowers. This one is labelled as a Tiered Tray Tidbit, but again I don’t really know why. 

This one uses seven colors and is 56 by 42 stitches. It comes out to 4 by 3 inches or 10 by 7.6 cm when stitched on 28 count linen (equivalent to 14 count Aida). It’s shown mounted on a wooden pumpkin, but you could put it in a frame or make it little pillow or whatever you like. 

There are lots of smaller categories with some themed projects, such as “calendar crates,” which are themed for the month but don’t actually have the month on them. There’s a lot of Christmas patterns, and smaller collections of Halloween/fall and spring projects. 

Another section is called “What’s in My Cup,” which features a tall coffee cup with text on it and decorations in and around the cup. For example there’s a happy birthday cup with a cake coming out of the top and surrounded by presents and balloons. The Good Old Days collection includes monthly minis with the month on one piece, a house decorated for the season and another little seasonal design. 

The seasonal series includes literal seasons as well as Halloween and Christmas designs. 

It’s hard to tell you what’s here but if you like the style of this one or combinations of text and fun images, check out all the goodies at Stitching Housewives. 

[Photo: Stitching Housewives]
«
»

Have you read?

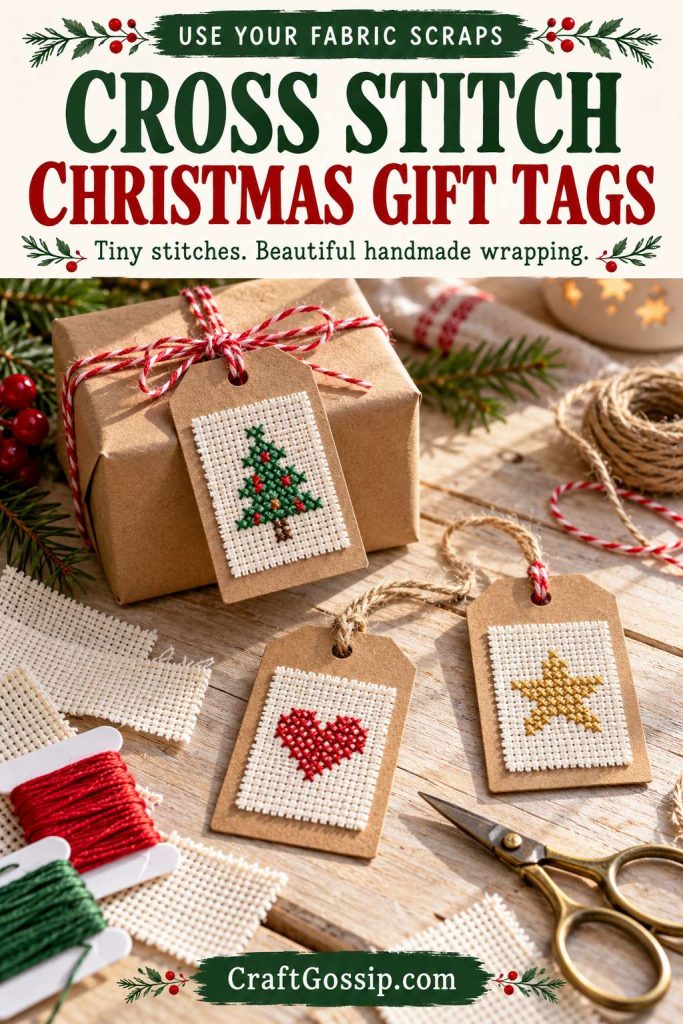
How to Make Cross Stitch Christmas Gift Tags With Small Fabric Scraps

Sometimes the smallest handmade detail is the one that gets noticed.

A tiny stitched tree on a plain parcel, a little star tied around a gift bag or an initial made especially for the recipient can make simple wrapping feel thoughtful. You don’t need elaborate paper or a mountain of matching decorations.

Cross stitch Christmas gift tags are also a useful project for smaller pieces of Aida. Those fabric offcuts lurking in the stitching basket might finally have found their moment.

This tutorial explains how to turn a small stitched motif into a card-backed gift tag. You’ll use a chart of your choice, then mount and finish the stitching so it is ready to attach to a present.

Materials for Cross Stitch Gift Tags

You will need:

  • A small Christmas cross stitch chart.
  • Aida fabric with enough room for stitching and finishing.
  • Embroidery floss specified by the chart.
  • A suitable tapestry needle.
  • A hoop, if you prefer using one.
  • Small scissors.
  • Firm card or ready-made blank gift tags.
  • Acid-free double-sided craft tape suitable for fabric and card.
  • A ruler and pencil.
  • A hole punch.
  • Ribbon or twine.
  • A pen for the recipient’s name.

Use suitable threads from your stash first. If you need a specific colour, browse DMC embroidery threads and match the chart’s colour numbers.

For backing, compare blank kraft gift tags on Amazon. Check the usable area below the hanging hole, rather than relying on the overall tag length.

Choose a Chart That Fits

Small trees, stars, hearts and initials work well, but “mini” doesn’t guarantee that a chart will fit your tag.

Divide the stitch dimensions by the fabric count to calculate the stitched size in inches.

For example, a motif measuring 14 stitches wide and 28 stitches high will measure 1 by 2 inches on 14-count Aida.

Allow additional room around the motif for the fabric border, plus a visible margin of card. Draw the proposed tag size on scrap paper and lay out the measurements before stitching.

Our mini Christmas tree cross stitch feature offers a seasonal starting point. DMC’s guide to reading cross stitch charts is helpful if you need a refresher.

Step 1: Prepare Your Fabric

Choose a piece of Aida large enough to handle comfortably.

Don’t cut it down to the final tag-panel size yet. A little extra fabric makes stitching and hooping easier.

Secure fraying outer edges if necessary, keeping any temporary edge treatment away from the area that will be displayed.

Before starting, check our cross stitch fabric preparation tips for advice on planning the finished project.

Step 2: Stitch the Motif

Follow your chosen chart, using the specified strand count.

Keep the top diagonal of your full crosses facing the same direction. Secure starting and finishing tails beneath stitches on the reverse.

Avoid long thread carries across blank areas, particularly with dark thread on pale fabric, because they may show through.

Check the finished motif before mounting it. Fixing a counting mistake is easier while the fabric is still loose.

Step 3: Clean and Press as Appropriate

Remove loose fibres and check the fabric and thread care instructions.

If washing is suitable for every material used, wash gently and allow the piece to dry fully. Don’t assume that hand-dyed threads or printed fabrics can be treated in the same way as standard materials.

Press according to the care instructions, usually from the reverse on a clean, padded surface.

Step 4: Cut the Fabric Panel

Decide whether you want a short fringed edge or a turned-under finish.

For a fringed panel, cut a straight rectangle with a generous border around the stitching. Remove a few outer fabric threads evenly along each side.

Keep the fringe well away from the stitched motif. A tiny fringe is decorative; a deep fringe creeping towards your stitches is a problem.

For turned-under edges, leave enough fabric to fold neatly around a thin card insert.

Step 5: Prepare the Tag

Cut a firm card tag larger than the fabric panel, leaving clear space at the top for the hanging hole.

Lay the stitching on the card without adhesive first. Check the margins and make sure the motif sits straight.

Write your message on the reverse now, while the tag is still flat.

Our earlier feature on finishing cross-stitched gift tags offers additional finishing inspiration.

Step 6: Mount the Stitching

Test the tape on an offcut before using it on your finished work.

Apply suitable double-sided tape within the backing area, keeping it away from fringed edges. Position the panel carefully and press gently.

Avoid saturating the fabric with liquid glue, which can seep through or leave marks.

These are decorative tags, rather than conservation mounts for valuable heirloom stitching.

Step 7: Add Ribbon and Attach to the Gift

Punch the hanging hole through the clear card area above the fabric.

Thread through ribbon or twine and tie it around the parcel. Keep the knot loose enough that it doesn’t bend the tag.

A simple bow lets the stitching remain the main feature.

Easy Colour and Style Variations

Try red stitching on cream Aida with brown card for a traditional finish. Blue and white work well for a winter theme, while a recipient’s initial makes the tag useful beyond Christmas.

Use the same ribbon across several tags to create a coordinated collection, even if the stitched motifs differ.

The nicest part is that you only need to make a few. Save them for people who will notice the stitches, turn the tag over and appreciate the time tucked into that little piece of fabric.

Categories

Book Reviews Christmas Craft Businesses Craft Inspirations Craft News and Events Cross-Stitch Patterns & Charts Cross-Stitch Product Reviews Cross-Stitch Website Reviews Dogs & Cats Easter flowers Free Patterns Halloween More Cross Stitch Product Reviews spring Subversive Thanksgiving Tutorials and Patterns valentines day

RSS feed: More Articles More Articles

  • Wet Felting with a Hand-Held Sander – My Honest Experience (and Safety Tips You’ll Actually Use)
  • How to Make Cross Stitch Christmas Gift Tags With Small Fabric Scraps
  • Thanksgiving Turkey Scrapbook Layouts to Gobble Up
  • 10 DIY Angel Jewelry Tutorials For Christmas
  • Single and Loving It Spaghetti: Easy Bolognese for One
  • Crochet Christmas Dove Ornaments With a Printable Gift Poem
  • DIY Fire Pit: 10 Backyard Ideas You Can Make on a Budget
  • 5 Christmas Ornament Quilt Patterns That Add Instant Holiday Charm
  • 15 Christmas Cards Using Patterned Paper Scraps
  • 10 Christmas Stocking Knitting Patterns Worth Bringing Out Every Year

Pick Your Blog

  • Sewing
  • Knitting
  • Quilting
  • Crochet
  • Home & Garden
  • Recycled Crafts
  • Scrapbooking
  • Card Making
  • Polymer Clay
  • Cross-Stitch
  • Edible Crafts
  • Felting
  • Glass Art
  • Indie Crafts
  • Kids Crafts
  • Jewelry Making
  • Lesson Plans
  • Needlework
  • Bath & Body
  • Party Ideas
  • Candle Making
  • DIY Weddings
  • Not Craft
  • Free Craft Projects

Copyright © 2026 · CraftGossip | Start Here | Contact Us | Link to Us | Your Editors | Privacy and affiliate policy