• Home
  • Suggest A DIY
  • DIY Newsletter

Cross-Stitch

Charts, patterns and everything needlepoint

  • About CraftGossip
  • Our Network
    • Bath & Body Crafts
    • Candle Making Ideas
    • Crochet Ideas
    • Cross Stitch
    • Edible Crafts
    • Felting Patterns
    • Glass Art
    • Home & Garden Ideas
    • Indie Crafts
    • Jewelry Making
    • Kids Crafts
    • Knitting Patterns
    • Lesson Plans
    • Needlework
    • Party Ideas
    • Polymer Clay
    • Quilting Ideas
    • Recycled Crafts
    • Scrapbooking
    • Sewing Patterns
    • Card Making
    • DIY Weddings
    • Not Craft Ideas
  • Giveaways
  • Roundups
  • Store
  • Search

Make Your Cross Stitch into an Iron On Patch

July 12, 2025 by Sarah White

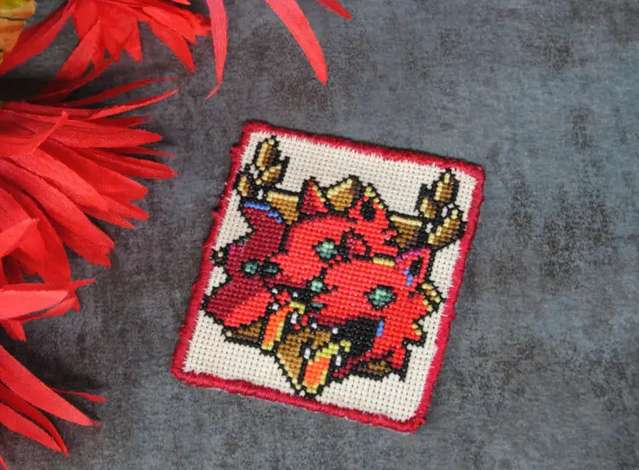
A while back I made a little rainbow cross stitch pattern and I wasn’t sure what I wanted to do with it, so I turned it into a patch. My idea was that it could be used on a jacket or backpack, or you could add a pin to the back and wear it temporarily on a shirt or elsewhere. 

But what if you want to make your design more permanent? Is it possible to turn a piece of cross stitch into an iron-on design?

It turns out yes, it is, and Sirious Stitches has done it so I didn’t have to try to figure it out on my own. 

The way they did it was by using HeatnBond, an iron-on adhesive that attaches fabrics without sewing. There was still sewing involved to finish the edges of the cross stitch fabric and make it look like a purchased patch. The post shows how to do this by hand or with your sewing machine. (I just did blanket stitch edging on mine, which doesn’t look like a “real” patch but is also a lot faster.)

Once you have the patch prepared it’s a pretty easy matter of using the fusible adhesive to the back of the patch so you can then iron it onto whatever jacket, pair of jeans, bag or whatever else you might want to add it to. 

I guess I’m a little paranoid about the washability of cross stitch projects, though you could hand wash anything with an iron-on cross stitch patch as you might need to with a purchased iron-on patch, anyway. But this does look really cool and is a great option if you know you want to permanently add a cross stitch patch to a garment of bag. 

Get the full tutorial over at Sirious Stitches. Would you add an iron-on cross stitch patch to something? I’d love to hear what you would use this technique for!

[Photo: Sirious Stitches]
«
»

Have you read?

How to Add Text to a Cross Stitch Project

One of the easiest ways to make a cross stitch project more personal is to add text to it. Whether you’re adding the names of people getting married to a generic floral cross stitch design, birth information to a project on theme with the new baby’s room or just adding a word or phrase that’s meaningful to you, adding words to cross stitch projects make them that much more special. 

But if you’re not working with a project that already has text built in, or you want to change the text that’s there, that can feel a little daunting. 

Caterpillar Cross Stitch has a great guide to adding names and words (as well as numbers) to projects, which talks you through what to consider and how to actually go about adding text to a cross stitch project successfully. 

You’ll need to think about what kind of font you want to use and if you’re using back stitched letters or larger filled letters, how much space you need and how the letters work together in the text you’re planning to make sure it’s readable. 

Their post includes common pitfalls such as running out a space or ending up with text that’s off center and how to avoid them (spoiler: chart out your text before you stitch!). 

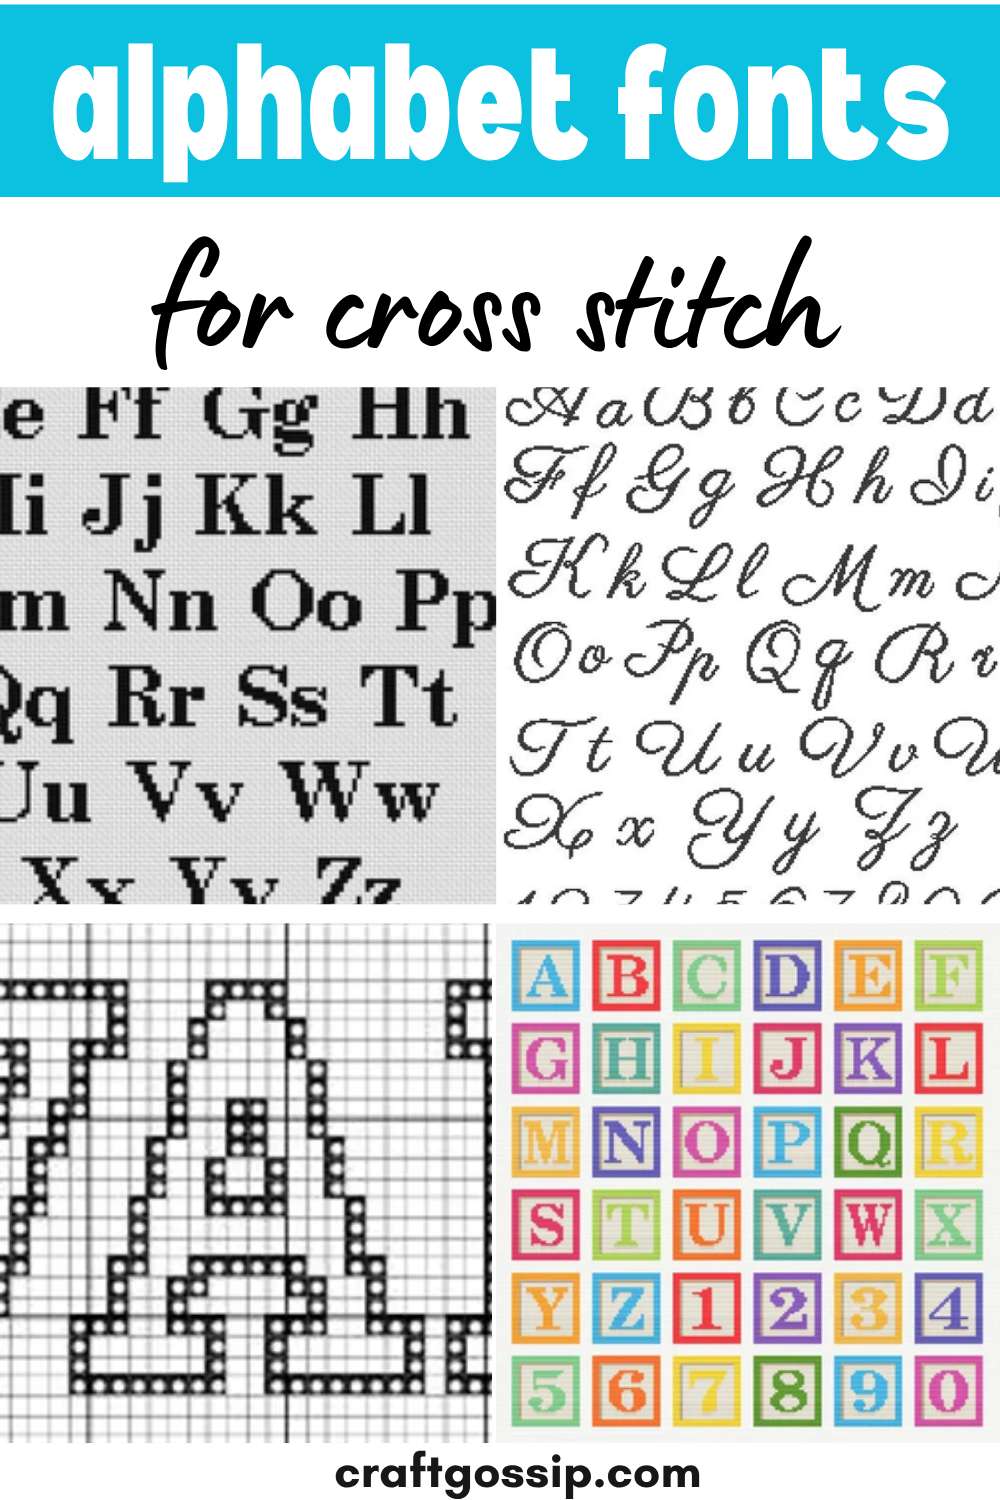
The whole post is really helpful if you’ve never added lettering to a project before and don’t know where to start. I like to use block letters in back stitch when learning how to add text to cross stitch, but of course there are tons of lettering options. Check out this collection of cross stitch fonts if you want to see some different things you can try. 

And head over to Caterpillar Cross Stitch to get more tips for how to successfully add lettering to your cross stitch projects. They also have their own alphabet and number charts you can buy to add text to your stitching. 

Have you ever added text to a cross stitch project? I’d love to hear how it went!

[Photo: Caterpillar Cross Stitch]

Categories

Book Reviews Christmas Craft Businesses Craft Inspirations Craft News and Events Cross-Stitch Patterns & Charts Cross-Stitch Product Reviews Cross-Stitch Website Reviews Dogs & Cats Easter flowers Free Patterns Halloween More Cross Stitch Product Reviews spring Subversive Thanksgiving Tutorials and Patterns valentines day

RSS feed: More Articles More Articles

  • Fun Halloween Cowls to Knit
  • DMC Blue Vespa Intermediate Cross Stitch Kit Review
  • 31 Haunting Street -Halloween Quilting Pattern
  • 9 Halloween Food Hacks You Can Make in Minutes (No Fancy Ingredients!)
  • 10 Halloween Bowling Ball Crafts for Spooky Upcycled Garden Décor
  • Free Crochet Santa Spiral Wind Spinner Christmas Ornament Pattern
  • FREE Dripping Font for Halloween
  • How to Create Easy Halloween Art Journal Pages
  • Etsy Feature – Pottery Travel Mug Template Set (3 Pieces)
  • Michaela McMillan: Weaving Stories into Sculptural Art

Pick Your Blog

  • Sewing
  • Knitting
  • Quilting
  • Crochet
  • Home & Garden
  • Recycled Crafts
  • Scrapbooking
  • Card Making
  • Polymer Clay
  • Cross-Stitch
  • Edible Crafts
  • Felting
  • Glass Art
  • Indie Crafts
  • Kids Crafts
  • Jewelry Making
  • Lesson Plans
  • Needlework
  • Bath & Body
  • Party Ideas
  • Candle Making
  • DIY Weddings
  • Not Craft
  • Free Craft Projects

Copyright © 2026 · CraftGossip | Start Here | Contact Us | Link to Us | Your Editors | Privacy and affiliate policy