• Home
  • Suggest A Craft
  • DIY Newsletter

Cross-Stitch

Charts, patterns and everything needlepoint

  • About CraftGossip
  • Our Network
    • Bath & Body Crafts
    • Candle Making Ideas
    • Crochet Ideas
    • Cross Stitch
    • Edible Crafts
    • Felting Patterns
    • Glass Art
    • Home & Garden Ideas
    • Indie Crafts
    • Jewelry Making
    • Kids Crafts
    • Knitting Patterns
    • Lesson Plans
    • Needlework
    • Party Ideas
    • Polymer Clay
    • Quilting Ideas
    • Recycled Crafts
    • Scrapbooking
    • Sewing Patterns
    • Card Making
    • DIY Weddings
    • Not Craft Ideas
  • Giveaways
  • Roundups
  • Store
  • Search

The Best Way to Store Embroidery Floss

July 12, 2024 by Sarah White

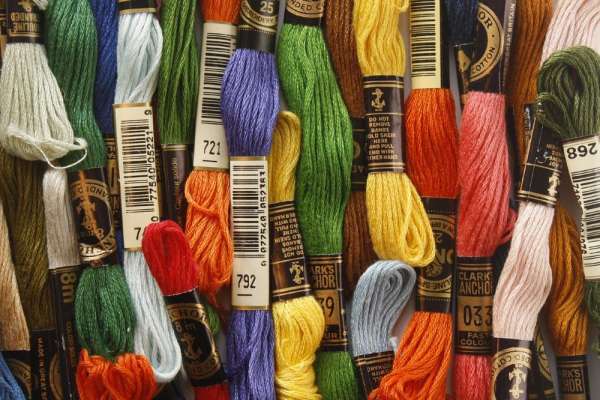
I am going to be honest with you and admit that my storage methods for my cross stitching supplies leave a lot to be desired.

As in, all of my floss, along with some bits of cross stitch fabric (maybe some actual fabric?), random hoops, some wooden beads for some reason, are all thrown into a zip-top plastic bag that a set of sheets came in. I think it started as a bag just for cross stitch stuff but it has not stayed that way and even though it’s small, it’s still kind of overwhelming to straighten out.

Actually, I have made a bit of progress on organizing my floss recently, because I was starting on a big project and I needed to see what floss I had that I could use before I bought more. So most of my solids are now separated from the variegated colors, but there’s still a whole lot of mess in there.

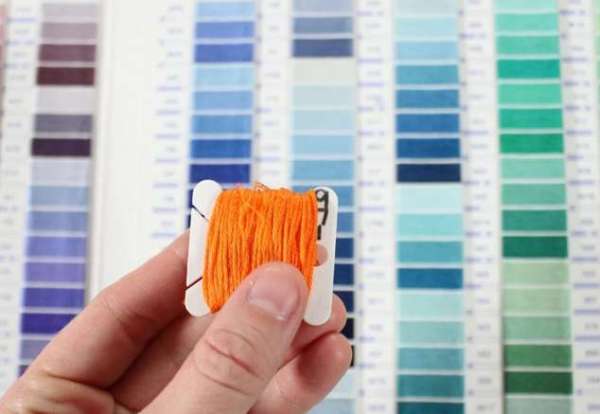
So to inspire me as much as to educate you, today we’re going to read if not heed the advice of Amanda, aka Crewel Ghoul, who it will probably not shock you to learn suggests using plastic bobbins to store embroidery floss.

This way your floss doesn’t get tangled, you can see what you have, you can even put it in number order if you’re feeling like an organizing superhero.

What I love about this post, though, is that it explains how to actually go about using plastic bobbins, as in how to load the floss on the bobbin without making a giant mess, how to label them and how to store them once they’re all sorted out.

This is long-term goals for me if I keep doing more big cross stitch projects. And the more I do it, the more I enjoy it, so that’s a real possibility.

Check out all the tips at Crewel Ghoul.

How do you store your embroidery floss? Make me feel better or jealous in the comments!

[Photo: Crewel Ghoul]

Next Pattern:

  • How and Why to Cross Stitch on Plastic Canvas
«
»

Have you read?

Fancy Pumpkin Cross Stitch Patterns

If you’re ready to move beyond basic, solid orange pumpkins, check out these pumpkin cross stitch patterns that are just a little bit fancier with some kind of pattern on the pumpkin. 

Keep it simple and rustic with this plaid pumpkin form Cross Stitch with Art. You can make the plaid whatever colors you want to match your decor, or keep with the Halloween color palette. It uses three colors and comes out to about 6 inches/15.24 cm square when you stitch it on 14 count fabric. 

Mamaida Pattern has this cute pumpkin with a vine in the negative space. Since that portion isn’t actually stitched (though you could make it green if you like) that makes this pattern pretty easy. It uses just two colors and measures 108 by 110 stitches. That’s about 7.7 by 7.9 inches or 19.6 by 20 cm on 14 count fabric. 

Speaking of negative space, this design by Tinsel Cross Stitch blows out the pumpkin a bit so the ridges are negative space and the colors here too have kind of a vineing effect. This design is 98 by 113 stitches and uses three colors. It measures 7 by a little more than 8 inches, or 17.78 by 20.5 cm on 14 count fabric.

Get even more detailed with the carving effect on this pumpkin cross stitch pattern from Anemone Patterns. This one is 85 by 83 stitches, which comes out to 6.1 by 5.9 inches (15.4 by 15.1 cm).

In a similar vein but a different color, there’s this pretty green pumpkin from Crystal Feather Crafts. Of course you could make it any color you like, but I always like to remind people that even in nature not all pumpkins are orange. This design measures 101 by 93 stitches, which is 7.2 by 6.6 inches/18.3 by 16.9 cm. 

And speaking of color, if you want to stitch a pumpkin with boho vibes, this one from Stitch Craft Creatives is probably the one for you. At 200 stitches square, it comes out to 14.4 inches or 36.3 cm square on 14 count fabric. It uses 14 colors for a very vibrant pumpkin!

Categories

Book Reviews Christmas Craft Businesses Craft Inspirations Craft News and Events Cross-Stitch Patterns & Charts Cross-Stitch Product Reviews Cross-Stitch Website Reviews Dogs & Cats Easter flowers Free Patterns Halloween More Cross Stitch Product Reviews spring Subversive Thanksgiving Tutorials and Patterns valentines day

RSS More Articles

  • Fancy Pumpkin Cross Stitch Patterns
  • DMC Orange Punch Needle Pattern
  • How To Make A Milk Carton Village – A Recycled Craft for Kids
  • Easy Sleeveless Top – Free Crochet Pattern
  • Poke Root And Castor Oil Recipes
  • 13 FREE Summerween Digital Stamps
  • “Transform Popsicle Sticks into Adorable Garden Makers – A Crafting Project You’ll Love
  • Book Review: The Sewing Book by Alison Smith
  • Apple Learning Activities
  • 12 Scrapbook Layout Ideas with a Quilted Look and some Sketches

Pick Your Blog

  • Sewing
  • Knitting
  • Quilting
  • Crochet
  • Home & Garden
  • Recycled Crafts
  • Scrapbooking
  • Card Making
  • Polymer Clay
  • Cross-Stitch
  • Edible Crafts
  • Felting
  • Glass Art
  • Indie Crafts
  • Kids Crafts
  • Jewelry Making
  • Lesson Plans
  • Needlework
  • Bath & Body
  • Party Ideas
  • Candle Making
  • DIY Weddings
  • Not Craft
  • Free Craft Projects

Copyright © 2025 · CraftGossip | Start Here | Contact Us | Link to Us | Your Editors | Privacy and affiliate policy