• Home
  • Suggest A Craft
  • DIY Newsletter

Cross-Stitch

Charts, patterns and everything needlepoint

  • About CraftGossip
  • Our Network
    • Bath & Body Crafts
    • Candle Making Ideas
    • Crochet Ideas
    • Cross Stitch
    • Edible Crafts
    • Felting Patterns
    • Glass Art
    • Home & Garden Ideas
    • Indie Crafts
    • Jewelry Making
    • Kids Crafts
    • Knitting Patterns
    • Lesson Plans
    • Needlework
    • Party Ideas
    • Polymer Clay
    • Quilting Ideas
    • Recycled Crafts
    • Scrapbooking
    • Sewing Patterns
    • Card Making
    • DIY Weddings
    • Not Craft Ideas
  • Giveaways
  • Roundups
  • Store
  • Search

Ways to Make Your Cross Stitches Neater

October 8, 2024 by Sarah White

When we start cross stitching, most of the time we are just focused on getting the needle into the correct hole in the fabric and keeping our tension even so that our stitching looks good. But over time you might want to refine your technique to make your stitches even neater.

One of the problems with cross stitching is that the thread tends to twist as we stitch, making stitches that don’t lie totally flat. The good news is lots of smart stitchers have figured out ways to counteract that twist and help make stitches that look better across a project.

You can read about three of these methods in depth over at HubPages, but I’ll cover them really quickly here.

The first I have talked about before and that’s railroading, which is where you split the two threads you are stitching with and take your stitch between them to keep them separate and therefore untwisted. (Read more about that here.) This is pretty easy to do and once you start doing it, will become a habit pretty quickly.

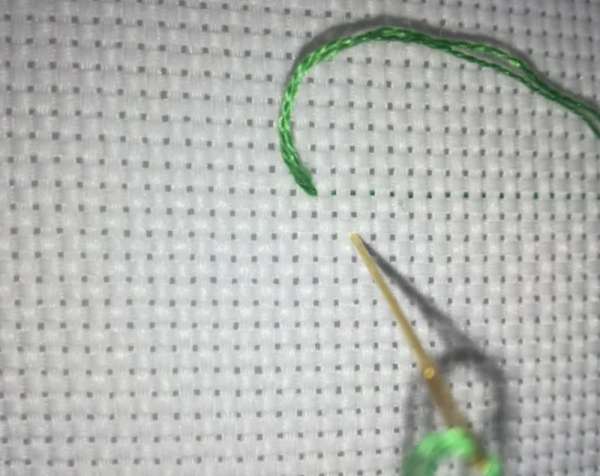
The post linked above also suggests that you can counter the twist in your thread by taking the needle through the fabric eye first instead of needle tip first when coming up from the back of the work. I’ve never tried this but it sounds like it would be pretty awkward.

Another thing that can help is just making sure that when you are stitching, the working thread is positioned above the area where you are making stitches. This doesn’t really help with the twisting, but it can help the stitches look more even and lie flatter on the fabric.

Have you tried any of these techniques? Do you have other tips for making your cross stitches neater? I’d love to hear your thoughts!

[Photo via HubPages]

Next Pattern:

  • How to Railroad Your Cross Stitch
«
»

Have you read?

Super Cute Ghost Cross Stitch Patterns

I’m always looking for different approaches to holidays in different crafts, and this year I’m noticing a lot of cute ghosts. Check out these adorable ghost cross stitch patterns for tons of cute without the creepy. 

Cute Patterns by Maria has a set of six adorable ghosts doing ghosty things like reading a book, talking to a crow, decorating with pumpkins and mushrooms and more. Stitch a single one, all six on one canvas, or each on individually to make your own adorable set of ghosts to scatter around the house. Each ghost is 67 by 86 stitches; the full set is 205 by 174 and uses 28 colors. 

Another cute set is this little three pattern set of ghosts with pumpkins and mushrooms. Designed by Wild Bluebell Patterns, the dimensions vary on them but they are super cute all stitched and hung together in hoops as shown. 

This set of hipster ghosts is meant to be stitched up as ornaments for you Halloween tree or to display individually, or you can make one big piece. These designs are from Artmishka Cross Stitch and show ghosts getting coffee, reading a book, riding a broom and more. The whole set uses 11 colors. 

If you have a dog friend in your life you’ll want to stitch up this sweet puppy ghost pattern from Holly Deer Stitch. The puppy is carrying a cute jack ‘o lantern with a candle and the project measures 7.14 by 6.79 inches (18.14 by 17.24 cm) on 14 count fabric. It uses 14 colors. 

Find a ghost among the wildflowers with this design by Woven Wild Crafts. They call it spooky but I disagree. The design is 10 inches/25.5 cm square when worked on 14 count fabric and uses 19 colors. 

Or keep it super simple with this little fall ghost cross stitch pattern from Crystal Feather Crafts. This little one is 56 by 47 stitches, which comes out to 4 by 3.4 inches or 10.2 by 8.5 cm on 14 count fabric. It uses 13 colors. 

Categories

Book Reviews Christmas Craft Businesses Craft Inspirations Craft News and Events Cross-Stitch Patterns & Charts Cross-Stitch Product Reviews Cross-Stitch Website Reviews Dogs & Cats Easter flowers Free Patterns Halloween More Cross Stitch Product Reviews spring Subversive Thanksgiving Tutorials and Patterns valentines day

RSS More Articles

  • Leaf Learning Activities for Kids
  • The Easiest 2-Ingredient Cupcake Hack (Plus 10 Delicious Variations!)
  • 2 Hour Crochet Sippers Pattern – Fast Rectangle Crochet Slippers – Cozy Feet in a Flash
  • Book Review: Upcycle: 24 Sustainable DIY Projects – Eco-Friendly Design Meets Crafty Creativity
  • How to Make a Funny Relaxing Summer Card
  • DIY Reusable Bowl Covers: Eco-Friendly and Stylish Kitchen Essential
  • Super Cute Ghost Cross Stitch Patterns
  • Knit a Sweet Striped Vest for Kids
  • DMC American Football Embroidery Pattern – A Fun and Sporty Stitch for Game Day Fans
  • Disney Scrapbook Mini Album Project

Pick Your Blog

  • Sewing
  • Knitting
  • Quilting
  • Crochet
  • Home & Garden
  • Recycled Crafts
  • Scrapbooking
  • Card Making
  • Polymer Clay
  • Cross-Stitch
  • Edible Crafts
  • Felting
  • Glass Art
  • Indie Crafts
  • Kids Crafts
  • Jewelry Making
  • Lesson Plans
  • Needlework
  • Bath & Body
  • Party Ideas
  • Candle Making
  • DIY Weddings
  • Not Craft
  • Free Craft Projects

Copyright © 2025 · CraftGossip | Start Here | Contact Us | Link to Us | Your Editors | Privacy and affiliate policy