• Home
  • Suggest A DIY
  • DIY Newsletter

Cross-Stitch

Charts, patterns and everything needlepoint

  • About CraftGossip
  • Our Network
    • Bath & Body Crafts
    • Candle Making Ideas
    • Crochet Ideas
    • Cross Stitch
    • Edible Crafts
    • Felting Patterns
    • Glass Art
    • Home & Garden Ideas
    • Indie Crafts
    • Jewelry Making
    • Kids Crafts
    • Knitting Patterns
    • Lesson Plans
    • Needlework
    • Party Ideas
    • Polymer Clay
    • Quilting Ideas
    • Recycled Crafts
    • Scrapbooking
    • Sewing Patterns
    • Card Making
    • DIY Weddings
    • Not Craft Ideas
  • Giveaways
  • Roundups
  • Store
  • Search

Quick Tip: How to Keep Cross Stitch Fabric from Fraying

May 15, 2025 by Sarah White

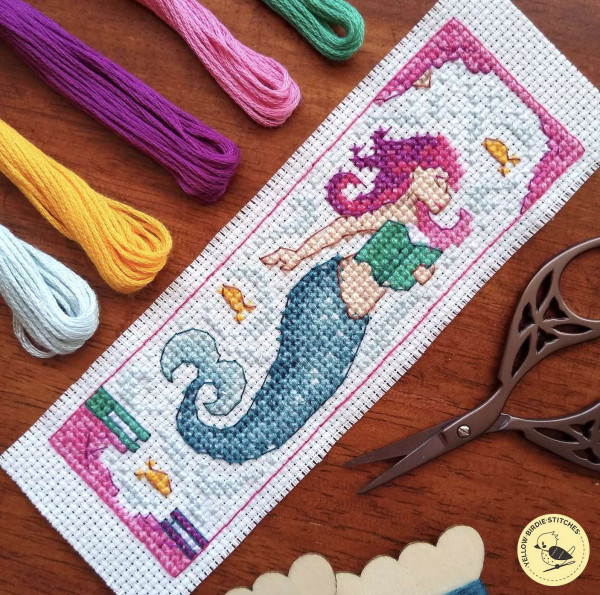
One of the most common problems that cross stitchers at all skill levels have is that the cross stitch fabric can start fraying while you stitch.

Beginner cross stitchers might wonder why this happens and if there is something they are doing wrong to cause it.

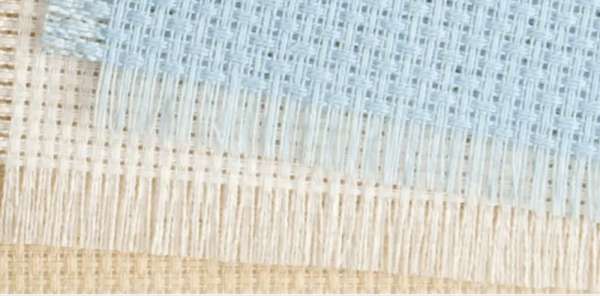
The reason cross stitch fabric frays is because it is a woven fabric, and the nature of any kind of woven fabric (whether that’s cross stitch fabric, a torn up towel or a piece of fabric you’re going to sew) is that it wants to fray.

It’s not necessarily a huge deal if you cross stitch fabric starts fraying mid-project if you have left a lot of extra fabric around your stitching. But if there’s not much fabric to spare in order to be able to finish the project the way you want, you’ll want to do something to stop the fraying.

When I was growing up I remember my mom using masking tape for this purpose, but it turns out there are lots of different things that you can do to stop your cross stitch fabric from fraying.

Craft with Cartwright came up with 15 different things that you can try, which seems like a lot, but that just means you have lots of different things you can try.

If you don’t want to buy something, you can stitch along the edges. If you already have supplies like tape or glue, or access to pinking shears or a serger, there are lots of options you can try.

Some of these are more permanent than others, so it will depend a little bit on how you want to finish your cross stitch project as to which is the best choice for you. It’s a great idea to read through the whole list just so you can have them in the back of yoru mind the next time you start a project and think about how you would like to protect it.

You can find the whole list at Craft with Cartwright.

How do you like to stop fraying on your cross stitch projects? I’d love to hear your thoughts.

[Photo: Craft with Cartwright]

Next Pattern:

  • An Easy Way to Keep Cross Stitch Fabric from Fraying
«
»

Have you read?

Everything You Need to Know About Embroidery Hoops

One of the most common supplies for cross stitch, aside from fabric, needles and floss, is an embroidery hoop. A hoop isn’t needed for every project, and indeed there are some stitchers who prefer not to use them at all. I generally don’t use a hoop when I’m working on a small cross stitch project, especially something that’s shape isn’t conducive to using a hoop (like a bookmark). 

But embroidery hoops can be really helpful for cross stitch because they hold your fabric at an even tension, which allows you to stitch more evenly without any more work on your part. It’s great for beginners to use hoops because the tension on the fabric can both help make your stitches more even and make the holes in the fabric a little easier to see. 

I’ll admit to always just buying whatever hoop is available in the right size when I’m ready to start a project without giving it much more thought than that. But there are things you should consider when choosing among the different kinds of hoops, which Caterpillar Cross Stitch covers in their great guide to embroidery hoops. 

The post walks you through wooden, plastic, spring tension and flexi hoops (which I’ll admit to having never heard of; they’re made of vinyl and plastic apparently), as well as Q-Snap frames, which aren’t really hoops because they’re made of plastic tubes that you snap together in the size and shape you need. 

It also covers what size hoop you should use for the project you’re working on and how to actually use a hoop in the right way. 

Whether you’re new to cross stitch or more seasoned, you’re sure to pick up a tip or a product to try in this post, so go check it out over at Caterpillar Cross Stitch. 

Do you have a favorite kind of embroidery hoop to use for cross stitch, or do you go without? I’d love to hear your thoughts!

[Photo: Caterpillar Cross Stitch]

Categories

Book Reviews Christmas Craft Businesses Craft Inspirations Craft News and Events Cross-Stitch Patterns & Charts Cross-Stitch Product Reviews Cross-Stitch Website Reviews Dogs & Cats Easter flowers Free Patterns Halloween More Cross Stitch Product Reviews spring Subversive Thanksgiving Tutorials and Patterns valentines day

RSS More Articles

  • The 5 Outlet Placement Mistakes You Don’t Want to Make
  • Celebrate the Spirit of the Southwest with These Stunning Indian Navajo Tribal Quilt Patterns
  • Pricing Handmade Sewing Items Without Undervaluing Yourself
  • Tips for Teaching the Alphabet to Kids
  • Yarn Sardines T-Shirt Review – A Whimsical Gift For Yarn Lovers
  • Cropped Chunky Granny Stitch Cardigan Crochet Pattern
  • Free Butterfly Digital Stamps for Card Making, Coloring and Paper Crafts
  • 14 Masculine Card Ideas for Guys
  • Juneteenth Cross Stitch Patterns
  • Ties to Knit for Father’s Day

Pick Your Blog

  • Sewing
  • Knitting
  • Quilting
  • Crochet
  • Home & Garden
  • Recycled Crafts
  • Scrapbooking
  • Card Making
  • Polymer Clay
  • Cross-Stitch
  • Edible Crafts
  • Felting
  • Glass Art
  • Indie Crafts
  • Kids Crafts
  • Jewelry Making
  • Lesson Plans
  • Needlework
  • Bath & Body
  • Party Ideas
  • Candle Making
  • DIY Weddings
  • Not Craft
  • Free Craft Projects

Copyright © 2026 · CraftGossip | Start Here | Contact Us | Link to Us | Your Editors | Privacy and affiliate policy