• Home
  • Suggest A Craft
  • DIY Newsletter

Cross-Stitch

Charts, patterns and everything needlepoint

  • About CraftGossip
  • Our Network
    • Bath & Body Crafts
    • Candle Making Ideas
    • Crochet Ideas
    • Cross Stitch
    • Edible Crafts
    • Felting Patterns
    • Glass Art
    • Home & Garden Ideas
    • Indie Crafts
    • Jewelry Making
    • Kids Crafts
    • Knitting Patterns
    • Lesson Plans
    • Needlework
    • Party Ideas
    • Polymer Clay
    • Quilting Ideas
    • Recycled Crafts
    • Scrapbooking
    • Sewing Patterns
    • Card Making
    • DIY Weddings
    • Not Craft Ideas
  • Giveaways
  • Roundups
  • Store
  • Search

Seven Ways to Anchor Your Cross Stitches

August 23, 2023 by Sarah White

I will fully and openly admit to being the sort of cross stitcher who starts her threads with a knot. I don’t usually care what the back of my work looks like, and I don’t need to it be perfectly smooth, so I’ve never had a problem doing it that way.

I always tie my knots like I show in this post on tying knots for hand sewing, which makes a large knot but it’s sturdy and it won’t pull through the hole in the cross stitch fabric.

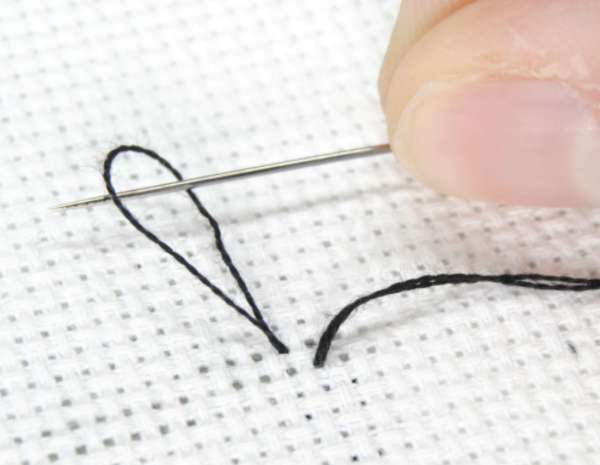
I know there are other ways, and potentially better ways, to go about starting a cross stitch project or working in a new piece of floss. If you’re wondering what they might be, check out this very comprehensive post from Sirious Stitches, which includes seven different options for securing your thread.

From techniques that bury the thread end behind the stitches as you work to various ways to use knots on the back to a couple of versions of loop stitches and one process that definitely looks like way too much effort, this is a great overview of your options if you’ve never really thought about how you start stitching or if there’s a “better” way.

Note here that better is totally subjective, and if you don’t mind knots on the back of your work and that’s the way you’re comfortable working, that’s probably the best method for you.

If on the other hand you need the back of your work to be pretty, because, for instance, you’re entering it in a competition of some sort, or the back will be visible for some reason, by all means check out another way to start your stitching that’s a little less intrusive.

Have you ever given any thought to how you anchor your stitches when you start a new thread of cross stitch? Are you on team never knot, or do you always start with a knot? Let’s talk about it!

[Photo: Sirius Stitches]

How to Frame Cross Stitch with Lacing

How to Wash Cross Stitch Projects 

How to Make Colored Cross-Stitch Fabric

Next Pattern:

  • How to Railroad Your Cross Stitch
«
»

Have you read?

All About Stitching on Perforated Paper

I recently wrote a post on my blog about using a stitchable journal cover and I mentioned that you can make your own stitched cover for a journal by using perforated paper instead of buying a stitchable notebook.

I have to admit, though, that I’ve never used perforated paper for cross stitch myself. I definitely want to because I think it would be great to use for bookmarks that don’t fray and have a little more stability, for example.

Sirious Stitches has us covered, though, because they did a deep dive into all things perforated cross stitch pattern that is worth the time to read through.

The post mentions that a lot of people use perforated paper for cross stitch because they buy an ornament kit that uses it. I’ve never seen these (or at least never noticed that that is what they were) but it’s a great idea to make small projects like ornaments in this way. It also talks about the pros and cons of using cross stitch paper, where to buy it and how to make your own. 

Making it yourself is an awesome idea because if you already have a pattern in mind you can just make holes in your paper where you need stitches to be and leave the rest solid. This would be ideal for making greeting cards, for example.

In addition to kits and sheets you can often find the paper pre-cut into different shapes you can use to make your own designs, no real pattern required.

The post also includes tips and advice for how to stitch on perforated paper that you’ll want to check out before you try your first project.

I’m super intrigued by the idea of using perforated paper for cross stitch and will probably be trying it out soon. Have you used it before? I’d love to hear your thoughts.

Check out the post over at Sirious Stitches for more information.

[Photo: Sirious Stitches]

Categories

Book Reviews Christmas Craft Businesses Craft Inspirations Craft News and Events Cross-Stitch Patterns & Charts Cross-Stitch Product Reviews Cross-Stitch Website Reviews Dogs & Cats Easter flowers Free Patterns Halloween More Cross Stitch Product Reviews spring Subversive Thanksgiving Tutorials and Patterns valentines day

RSS More Articles

  • 18 FREE Labubu Coloring Pages and Digital Images
  • How to Make the Perfect Little Baker’s Apron for Kids: A Fun Sewing Project
  • Mr Fox Toy Crochet Pattern
  • 5 Genius Tips to Keep Your New Home Clutter-Free from Day One
  • All About Stitching on Perforated Paper
  • Decorative Vase Embroidery Pattern from DMC
  • Lesson Plans – Moss and Lichen Unit Study
  • 8 FREE Elegant Pattern Papers for Weddings
  • Knit a Garter Stitch Blanket with a Twist
  • Fabulous 5-Yard Quilts Booklet Review

Pick Your Blog

  • Sewing
  • Knitting
  • Quilting
  • Crochet
  • Home & Garden
  • Recycled Crafts
  • Scrapbooking
  • Card Making
  • Polymer Clay
  • Cross-Stitch
  • Edible Crafts
  • Felting
  • Glass Art
  • Indie Crafts
  • Kids Crafts
  • Jewelry Making
  • Lesson Plans
  • Needlework
  • Bath & Body
  • Party Ideas
  • Candle Making
  • DIY Weddings
  • Not Craft
  • Free Craft Projects

Copyright © 2025 · CraftGossip | Start Here | Contact Us | Link to Us | Your Editors | Privacy and affiliate policy